3D Builder | Design Metal Buildings & Metal Carports
A Quick Note About Designing Metal Buildings & Metal Carports
The Carport Co.’s 3D Builder tool allows customers to design metal carports, garages, commercial buildings, and other steel structures in real time. Customers can change colors, add doors, windows, frame outs, insulation, and more.
Depending on your area, some colors will be unavailable. We use several manufacturers, and each one offers different colors. We will always do our best to ensure we bring this to your attention after submitting a build. Many manufacturers have very similar colors available. They may just be a few shades off what you see in the 3D builder.
If the 3D builder says you are outside of our coverage area, this may not be the case. Again, we work with several manufacturers to cover as much ground as possible. To see if we can still assist with your project, please call (888) 293-5588 or email [email protected]
How to Design a Metal Building or Metal Carport
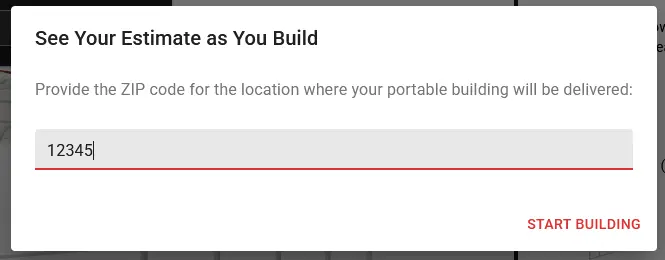
To design a metal carport, garage, shed, or commercial building using the 3D builder, you will first want to input your zip code. This ensures the design correctly reflects your local building regulations. We build closer or further apart depending on the area, which changes the placement of the legs and frame bows, and it’s important to know where these items will be located when choosing where to place your roll up garage doors, walk in man doors, and windows.
After you input your zip code, you will want to click “Start Building.”
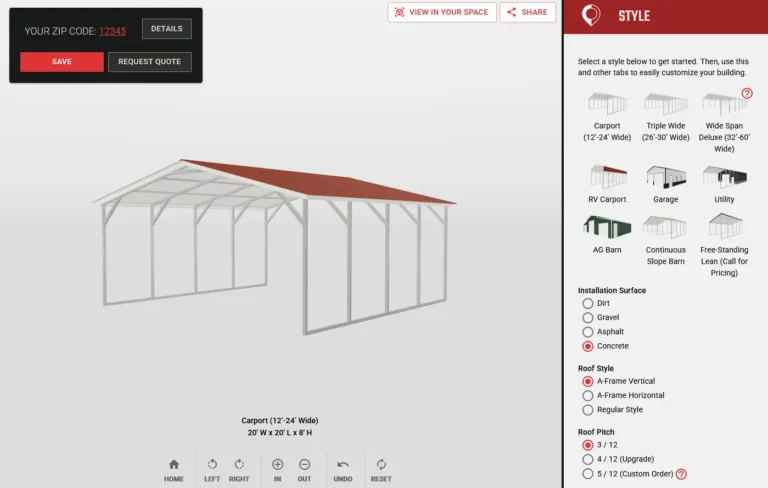
1. Choosing Your Strucure's Style
Now that it’s time to choose your structure’s style, we recommend either choosing “Carport” if your width is between 12′ to 24′, or “Triple Wide” if the width is between 24′ to 30′. If your structures width will be wider than 30′, we would consider it a commercial building, so you will need to select “Wide Span Deluxe.” If you want a single pitch structure, like a lean-to, select “Free-Standing Lean.”
We recommend only using these options and avoiding “RV Carport,” “Horizontal Garage,” “Vertical Garage,” “Utility,” and “AG Barn.” The reason we suggest not using these options is that they will restrict what you can do with your structure in the builder. If you use the options we suggested, you will have full control over dimensions, doors, etc.
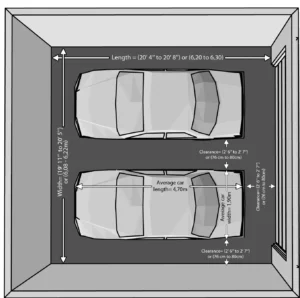
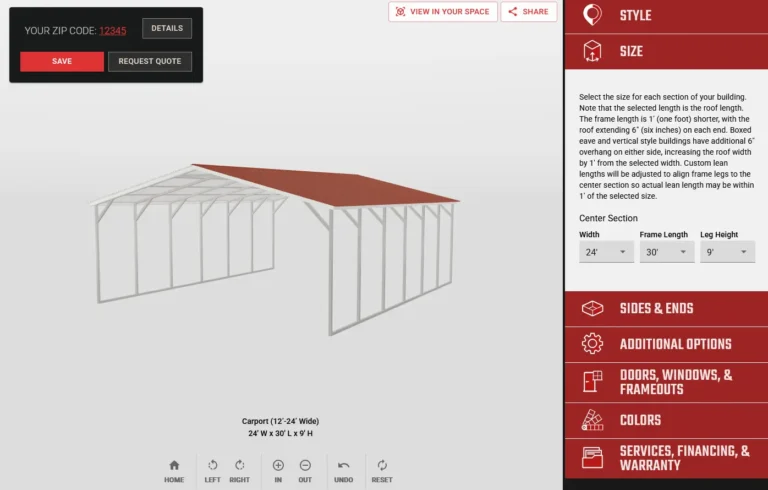
2. Setting Your Structure's Dimensions
It’s time to set your building or structure’s dimensions. Navigate to the “Size” tab and choose what size you want your structure to be. Dimensions work like this:
- Width: the measurement beneath the gable end (where the roof makes an A). Measured from outside of one leg, to the outside of the other.
- Length: how far your building “runs.” Measured from outside of closest leg to outside of furthest leg.
- Height: how tall your structure is at the top of the “side wall.” Your peak will always be higher than this measurement. Most structures have a 3/12 pitch. To calculate your peak height, you can use the following formula:
- (width ÷ 2) * 0.25 + height of legs
- Example of 20W x 30L x 10H building: (30 ÷ 2) = 15 ||| 15 * 0.25 = 3.75′ ||| 3.75 + 10 = 13.75 ||| Height of peak would be 13′ 9″.
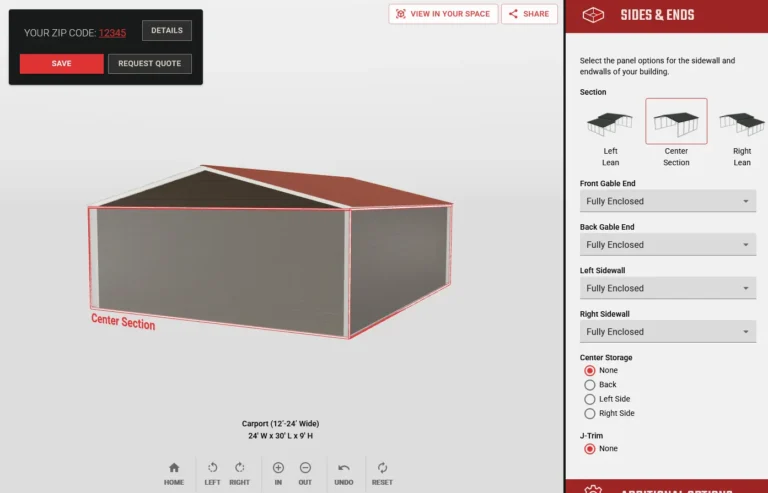
3. Adding Sides and/or Ends to Your Structure
Adding sides and ends on a garage are required to consider it a garage, but adding sides and/or ends to a carport is also quite common. You can add full sides/ends, or only choose to cover a portion. To do this yourself, open the “Sides and Ends” tab.
From here, select which side or end you would like to enclose. For example, if you wish to enclose the back end, click “Open” under “Back Gable End,” and select “Fully Enclosed.” If you wish to add only a 3′ panel to the left side, select “Open” under “Left Sidewall” and select “Top – 3′ Panel.” Side note: if you want your structure to have panels on the bottom, but not fully enclose the side, we can do that, you just can’t preview it on the 3D builder.
What is a gable end? A gable end is covering everything above where the top of the legs are, AKA enclosing the entire A portion of an A-frame. A double gable end is a gable end with a 3′ panel added to it.
4. Additional Options: Vertical Siding, Insulation, 12-ga Framing
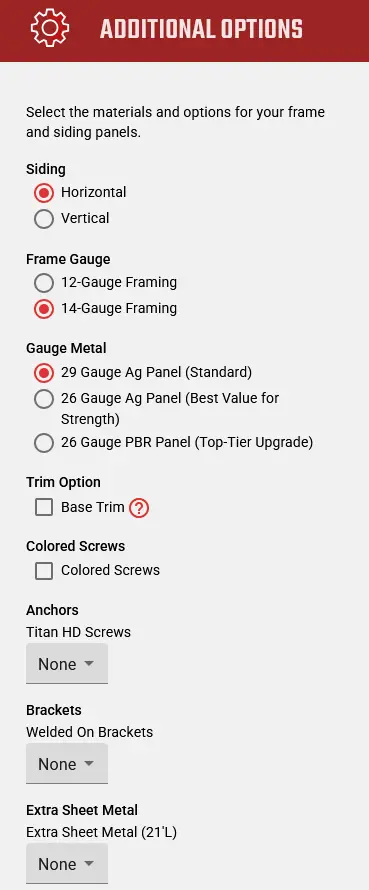
Our structures are highly customizable, and every project is unique. We can have many configurations of your structure manufactured. To view additional options that are available, open the “Additional Options” tab. Here’s an explanation for each term:
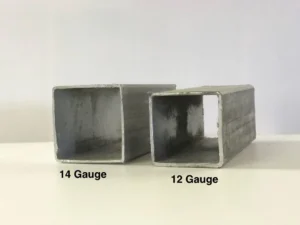
Frame Gauge: We offer both 12-gauge and 14-gauge options. 12-gauge steel comes with a 20-year warranty from most manufacturers. The lower the gauge, the higher the snow load and wind resistance.
Wind Warranty: As long as you purchase the correct anchor package for your structure, it will come with a wind warranty. The wind warranties we offer range from 90 MPH to 120 MPH. The manufacturer we use for most of our structures has a 120 MPH wind warranty. Though the warranty is only 90 to 120 MPH, the anchors meet specifications up to 135 MPH in most locations.
Sheet Metal Gauge: Sheet metal comes in both 26-gauge and 29-gauge. The color and fade warranties are identical for whichever you choose. 24-gauge and 26-gauge are the most common options on homes that have sheet metal. 29-gauge is industry standard
Colored Screws: By default, all screws used in your construction are stainless steel and have black rubber gaskets. Some customers don’t like this look and opt for purchasing screws and rubber gaskets that match their structure color.
Header Seal: When a roll-up door gets installed, there is a gap left behind. It’s about a 1 inch opening above the door. This isn’t a huge deal, but if you wish to climate control your structure in the future, this is something you should probably purchase now.
Insulation Material: The only insulation material our 3D builder shows is R16 Bubble, commonly referred to as reflective foil insulation or double bubble insulation. Besides what you see on our 3D builder, we have both fiberglass and spray foam available for purchase.
5. Adding Doors, Windows, and Frame Outs to Your Structure
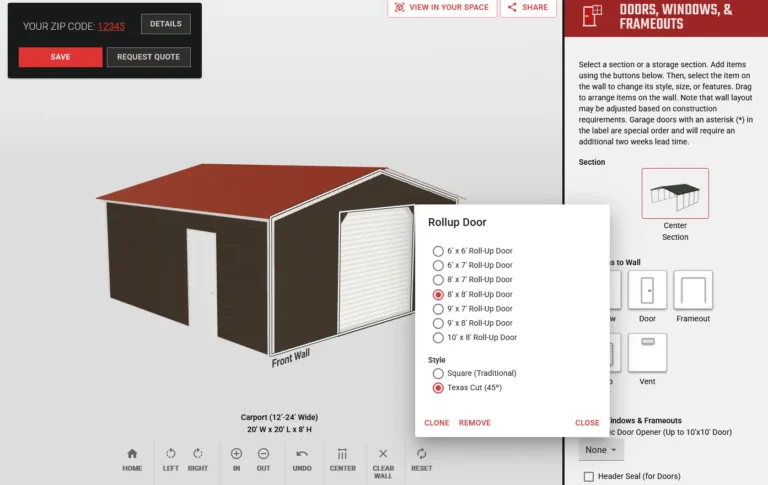
To add doors, windows, or frame outs to your structure, open the “Doors, Windows, & Frame Outs” tab. From here, drag your structure so the side or end that you want to put a door, window, or frame out on is facing you. Then, under the tab you have opened, select whichever option you’d like to add to your structure.
Once you’ve placed a door, window, or frame out on your structure, you can click it to adjust the size and other specifications. To move your door, window, or frame out, simply drag it to where you want it.
Please note: you can not drag a door, window, or frame out from one side or end to another. You must first remove it by clicking the door, window, or frame out, and selecting “Remove.” Then you will need to pan the view so the side or end where you wish to add the item is in front of you. Then, add the item back.
6. Choosing Your Colors
Now comes the fun part, choosing your colors and watching your structure come to life. To change your structure’s colors, open the “Colors” tab. You will then be able to select a color for the roof, trim, ends, and sides. You will also be able to add deluxe wainscotting to your structure. Wainscotting is essentially making the bottom 3′ of your structure a different color.
Deluxe wainscotting note: deluxe wainscotting is free for all structures with horizontal siding. There is an up charge for structures with vertical siding.

7. (Optional) Adding a Lean-to on to Your Structure
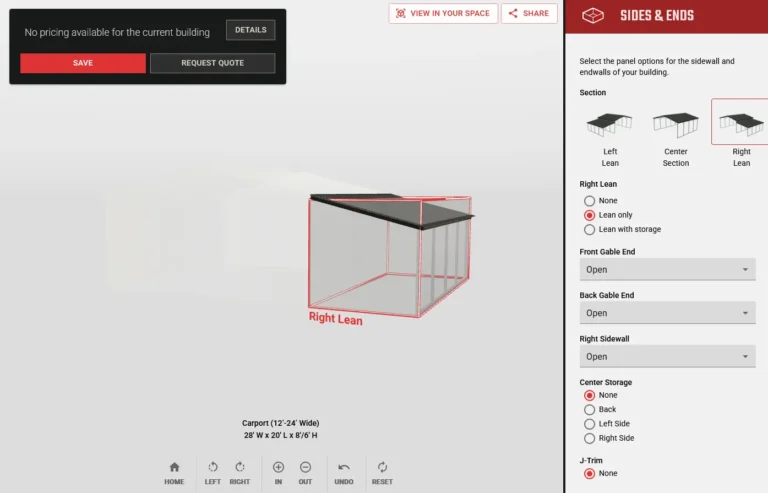
Lean-tos have many uses. Some customers use them to increase the size of the interior of their structure. Some use them as a covered porch, and some use them for storage. Whatever your use case is, we can build to suit it. To add a lean-to on to your structure, open the “Sides & Ends” tab again. If you wish to have the lean-to off the right side, select “Right Lean.” If you wish to have the lean-to off the left side, select “Left Lean.” Then, click “Lean only.”
You will see the lean-to appear. The first thing you’ll probably want to do is head back up to the “Size” tab and change the sizing. From here, you can customize the lean-to as you like. You can add sides, ends, windows, frame outs, insulation, etc. It’s just like customizing a mini building.
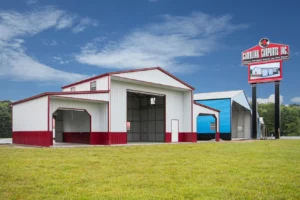
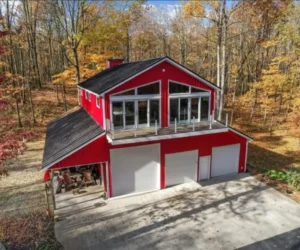
Make Your Dream a Reality!
Turn your 3D build into a reality! The above photo was once just a 3D rendering of a metal garage that someone has. Now it’s a physical, tangible structure you can touch. Get started today by calling (888) 293-5588 or requesting a quote.
Let's Find the Right Structure for Your Property
Ready to protect your vehicles, equipment, or outdoor space? Here’s how to get started:
→ Get a free quote – Visit our Get a Quote page
→ Call us directly – (888) 293-5588 (call or text)
→ Design your own – Use our 3D Builder to customize your structure
No pressure, no runaround. Just honest guidance and quality American-made structures.
Get Your FREE Custom Quote
No-obligation, 100% FREE quote, delivered in minutes.
Our Ultimate Buyer’s Guide covers everything first-time buyers need to know—from understanding gauge thickness to choosing the right roof style to preparing your site.
The goal? Make sure you know all your options before you order, not after installation when it’s too late to add them.